Uploading amendments, invoices, and creating notices is essential for keeping all lease-related documents organized and up-to-date. This process helps in tracking modifications, payments, and important notifications related to leases. Below are the steps for each action within the new UI.
Steps to Upload Amendments and Invoices
Go to the Documents Tab on the Property Page
Navigate to the Documents tab located on the property page where you want to upload the amendment or invoice. This tab serves as the hub for managing all property-related documents.

Click the "Upload" Button
In the Documents tab, click on the Upload button to begin uploading your document.

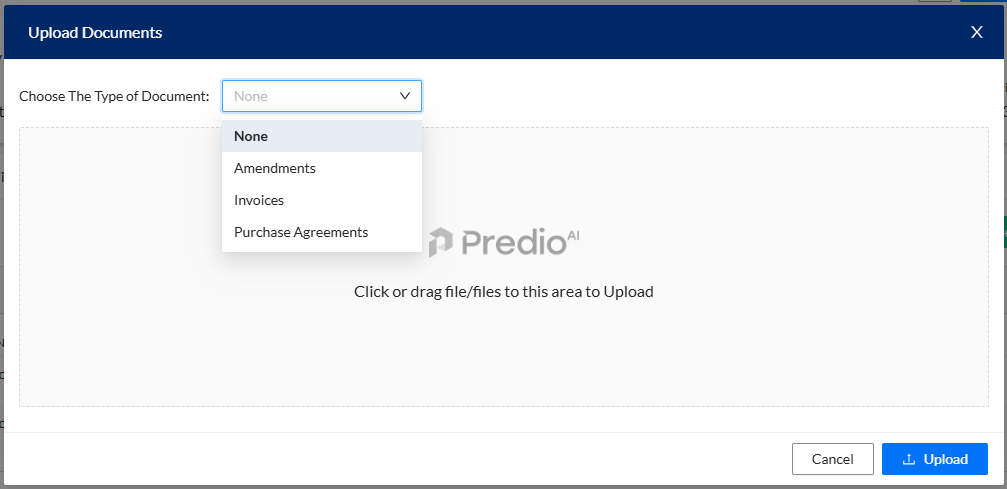
Select the Appropriate Document Type
Choose the correct document type from the options available. For example, if you are uploading an amendment, select Amendment; for invoices, select Invoice.
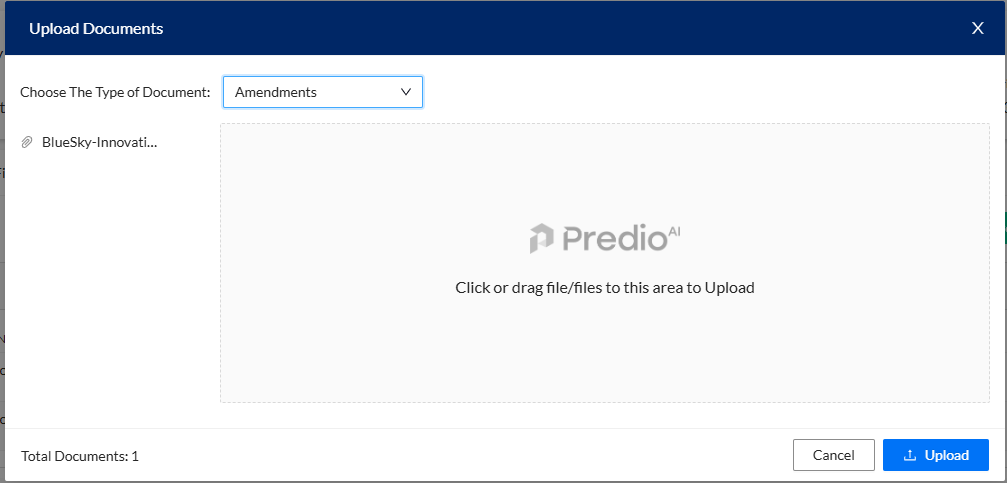
Select and Upload the Document from Your Device
After choosing the appropriate document type, browse your device and select the file you wish to upload. Click Open to upload the document to the platform.
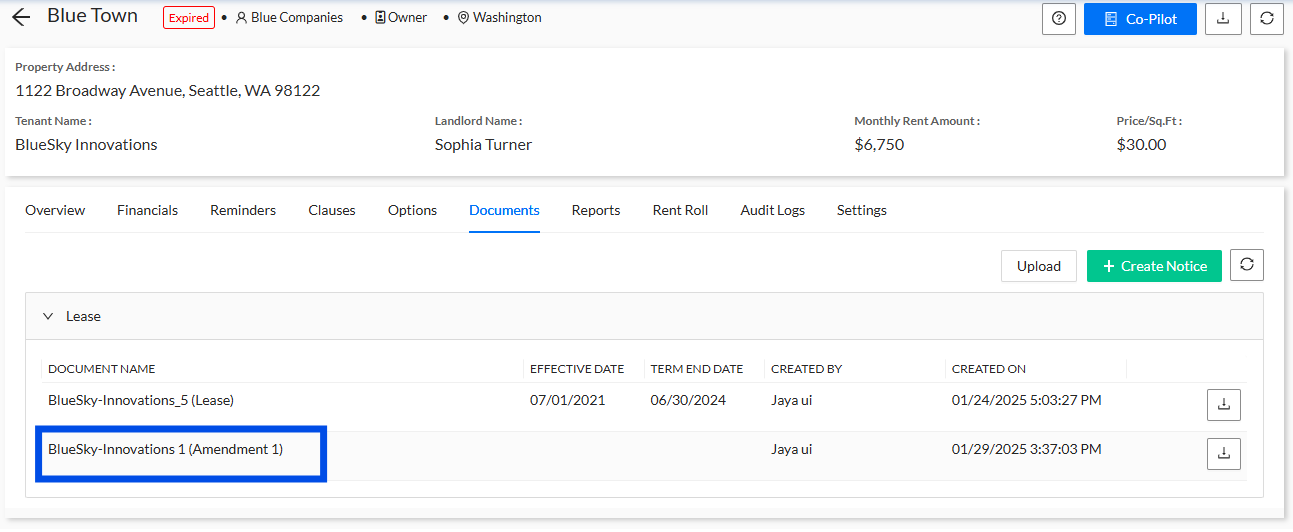
View the Uploaded Document under the "Main Lease"
Once the document is uploaded, it will appear under the Main Lease section on the property page. You can easily access and review it here.
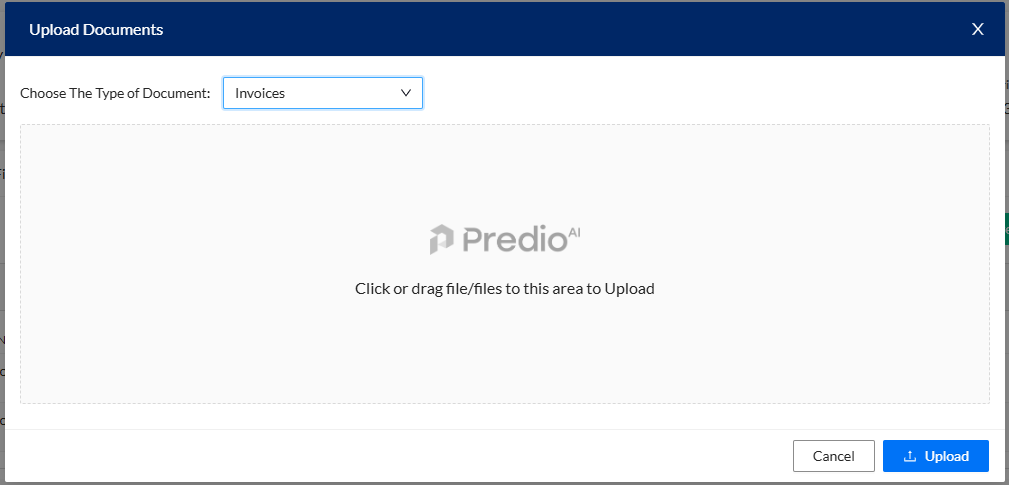
Upload an Invoice
If you’re uploading an invoice, follow the same steps. Select Invoice as the document type and upload the invoice file from your device.
View the Uploaded Invoice under the Lease
After uploading the invoice, you will find it listed under a separate section for Invoices on the lease page, making it easy to track payments and due amounts.

Steps to Create a Notice
Click the "Create Notice" Button on the Property Page
In the Documents tab of the property page, click on the Create Notice button to begin the process of creating a new notice.

A Pop-Up Screen Opens for Creating the Notice
Once you click Create Notice, a pop-up window will appear, allowing you to fill in the necessary details to create the notice.

Select the Document Type and Template for the Notice
In the pop-up screen, choose the Document Type (such as Rent Notice, Lease Expiry Notice, etc.) and select whether you want to use a Blank Page or a Template for the notice.

Click on the Create Button
After selecting the appropriate options, click the Create button to generate the notice. It will be saved as a draft, allowing you to review it before sending it for approval.
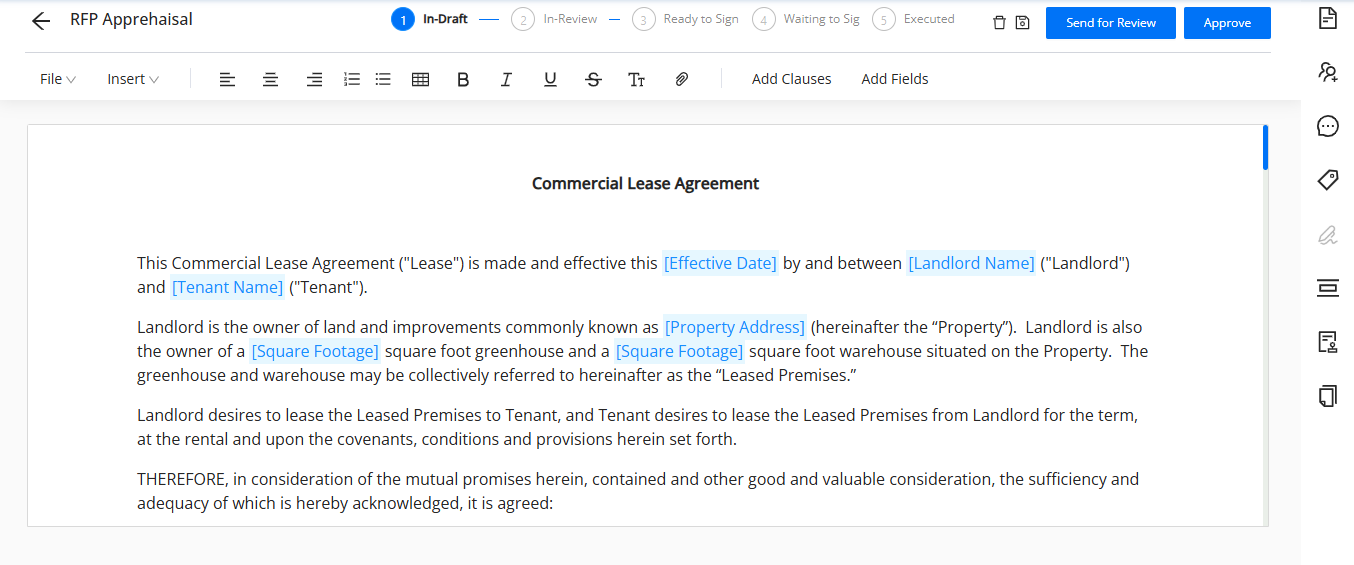
Review, Send for Review, and Approve
Once the notice is created, it will be in Draft mode. You can send it for internal review, where it can be approved by your collaborators. After approval, the notice is ready for distribution.
What’s Next?
After uploading amendments and invoices or creating notices, you can continue managing the documents directly from the Documents tab on the property page. You can review, update, or share the documents as needed, ensuring that all lease-related changes and notices are properly documented and communicated. This streamlined process keeps your lease management organized and efficient, saving time and reducing the risk of missing important details.
Was this article helpful?
That’s Great!
Thank you for your feedback
Sorry! We couldn't be helpful
Thank you for your feedback
Feedback sent
We appreciate your effort and will try to fix the article